Everything posted by Carlos Gessler
-
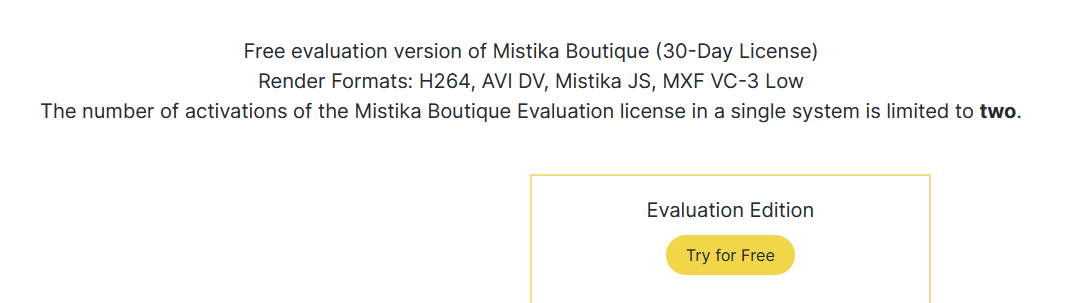
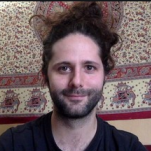 Hi, Thanks a lot for reaching out! I´m afraid the the Eval version only supports H264, AVI DV, Mistika JS and MXF VC-3 Low On the other hand, MacOS computers does not support NVidia codecs. I´m sorry for the inconvenience. Cheers! Carlos
-
Hi haihong liu, Thanks a lot for reaching out! I´sorry that you have had this issue, on some computers a complete system reboot usually solves this issue, please try that first. If this doesn't solve the license issue we can try to manually restart the license server itself to force it to refresh the license file. In windows: 1.- Right-click on the windows menu-bar and in the context menu open the Task Manager 2.- Click on "More detail" if needed, go to the Processes tab and look for the sgoLicenseServer process. 3.- Right-click on it and, in the context menu select "End Task" In OSX: 1.- Go to Finder -> Applications -> Utilities -> Activity Monitor 2.- Look for the sgoLicenseServer process and double click on it 3.- Click on "Quit" and then in "Force Quit" Please, try it and try to run again Mistika. If it does not work please, open a ticket in support.sgo.es to get deeper into de issue. Cheers! Carlos
-
Hi Zuan, Thanks a lot for reaching out! Of course, let me share with you some recommendations about settings for performance: https://support.sgo.es/support/solutions/articles/1000296927-mistika-vr-advanced-cpu-optimizations I hope it's useful! Cheers! Carlos
-
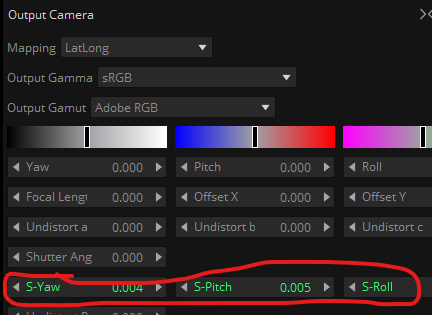
Hi, Could you please check if the s-Yaw, S-Pitch and S- Roll are animated when you open Mistika VR again after stabilize and save? You can see it because the values are in green: Cheers! Carlos
-
Hi! Yes, there is a workaround. Let me share with you: Just open a Command prompt, then drag your Mistika Boutique shortcut icon into the command prompt (the path will be painted) and then, add "-f" and press enter. Mistika will be opened and your HS preview will work. The command prompt should be displayed as: And of course, in the next version (it will be released soon) this issue is fixed. I hope it´s useful! Cheers! Carlos

-
Hi Alessandro, Thanks a lot for reaching out! I´ve replied to you via Support Portal. Have a nice day! Carlos
-
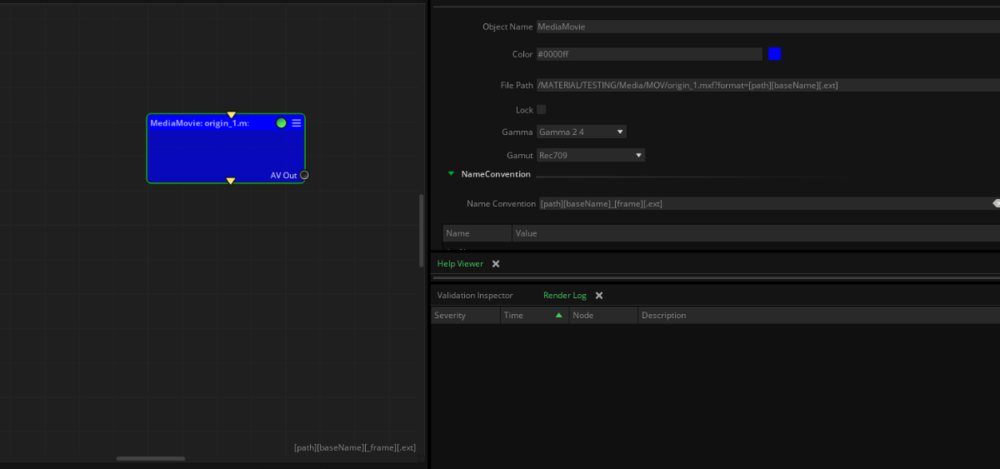
Hi Joao Gabriel, Thanks a lot for reaching out! Likely your name convention is not set as [baseName]_[frame].[ext] and for this reason, your tiffs are not being recognised as sequence. What I recommend is to open you Name Convention field in your input media property node (your watcher in your case) and set it like this: Please, let me know if it worked. Cheers! Carlos
-
Hi Ken, Thanks a lot for reaching out! Due to the insta360 pro 2 mapping, the best way to keep all your information is by setting the render vertical size as close as possible to your vertical shots size. In this way, if your shots are, for example: 3200x2400 I recommend to set your render as 4800x2400 (because 4800 is twice 2400, and if you keep your vertical as 2400, your horizontal must be 4800 to keep the 2:1 recomended aspect ratio for Latlong images. Talking about the target device, it depends on the device and your purposes. In the case of Oculus, I recommend to export to HEVC codecs, because .mov (as far as I remember, maybe it has changed) are not supported by Oculus, and HEVC will offer you the best results interms of resolution and performance inside the headset. I hope it´s useful! Please, do not hesitate to ask anything if you need further assistance 🙂 Cheers! Carlos
-
Hi Ken, Thanks a lot for reaching out! You can try to modify the Yaw/Pitch/Roll parameters on the output camera panel. In this way you will be able to modify your front or repositioning your shot. This tutorial may help you: To zoom in/out your camera, you can change the mapping to "planar rectilinear" in your output camera tab, and then, you´ll be able to set your focal lengh (But remember that you´ll lost some parts of the image. Have a nice day! Carlos
-
Hi Jay, Thanks a lot for reaching out! We´ve received your message in our support portal so let me paste the reply I sent you via support portal 🙂 "In the case you have a different computer to send files there is a parameter that "force checking". This parameter is located at the Watcher node "Force check". Just set the number of second you want to the Watcher check for changes inside the folder. It should make work your workflow. Please let me know if it worked for you. Cheers! Carlos"
-
Hi cthastings, Thanks a lot for reaching out! Could you please open a ticket in out support portal? https://support.sgo.es/support/home In this way we can follow personally your case. Have a nice day! Carlos
-
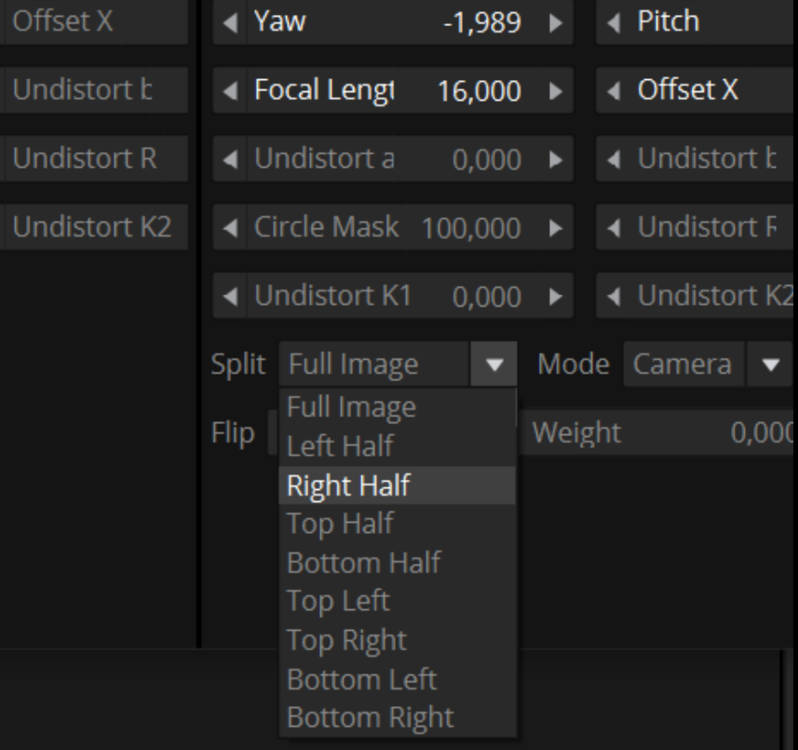
Hi Mikel, Thanks a lot for reaching out! Yes, it is possible in Mistika VR 🙂 - The first thing is to import your footage every times as the lens you have. So if you have two lenses, just import your footage two times. - Then select the first camera and open "Input cameras" tab. Click on Split and a dropdown menu will show you different options: - In your case please select Top half. It will split your image and will delete the bottom half lens. - Now select the another camera and split it as Bottom Half to get it. Now you have the lenses splited and separated in two cameras 🙂 I hope it's useful! Please let me know if it worked for you. Cheers! Carlos
-
Hi Jay, Thanks a lot for reaching out! You are right, I'm searching the preset but I've not found it. Don't worry, I can create a preset for your camera 🙂 Just open a ticket in our support portal sending us a sample of your camera and I'll create a preset for you. https://support.sgo.es Cheers! Carlos
-
Hi Grunken, Thanks a lot for reaching out! In Mistika you can change your cameras focal length inside the VR Stitch FX via Camea Defaults or Input Camera. Camera Defaults affects all the cameras on your VR Stitch. And input cameras affects the cameras focal length individually. However, if a different value from the default is set in input camera, default camera won´t affect to this specific camera. Please, try it and if further assistance is needed do not hesitate to open a ticken in our support portal: support.sgo.es where you can send us the .env and we´ll happily take a look 🙂 Have a nice week! Carlos
-
Hi ShyBoy, Thanks a lot for reaching out! And I´m sorry for the delay. Of course I can guide you to the right direction 🙂 And you are right, you need to split the Qoocam file. In this way, Mistika Boutique offers you "Switch to Second Video track" feature, located on Edit/Macros/Switch to second video track. Let me explain the process: - Import your Qoocam footage. - Open your clip and change your result size to "input": - As the file is composed by two tracks, duplicate your media in order to get your Qoocam file two times in your Timeline. To do this, just press alt while drag and dropping the file. Place your copy below the original. - Select your copy and click on Switch to second video track. The second video track will be revealed. - Put a VR stitch grouping your two clips and select the Qoocam preset 🙂 I hope it´s useful! Please, let me know if it worked for you. Cheers! Carlos
-
Hi! Thanks a lot for reaching out! In which software need to create the Keyframes? Mistika VR or Mistika Boutique/Ultima? Here you have the explanation about the keyframes in Mistika VR, however, I can explain you how to create in Mistika Boutique/Ultima: To animate any parameter, just right-click on the parameter and click on add keyframe (In the edge points case, select the Yaw or pitch in the Edge points tab, it will keyframing both parameters). You´ll notice that the parameter turns blue. (It indicates that it´s animated). The keyframes are painted as a little arrow in your timeline. When you have more than one (the parameter is animated) you´ll notice a blue line that connects the keyframes. To navigate between the keyframes just "Shift+right" or "shift+left" or by clicking: To delete it, just navigate to your keyframe (The parameter turns green). Right-click and select "Remove keyframe": I hope it´s useful!! Cheers! Carlos
-
Hi! Thanks a lot for reaching out! This circle likely is the part of the 360º sphere that the lenses couldn´t capture. In some cameras, the fisheye lenses can´t cover the entire 180º in top and bottom, so, when you do the stitching, this lack is shared by the rest of the lens and causes the black circle on top and bottom. To make sure, you can send me the media that causes these black circles. Please, open a ticket in our support portal: https://support.sgo.es In this way, we can be sure that this is the reason or there is another reason. Have a nice day Carlos
-
Hi again Javier. I´ve been talking with Dev team. How are you importing the audio. It is embedded on the media clip or are you importing it individually and then, inserting it by using the transcoder audio input? Thank you very much! Looking forward to your answer! Carlos
-
Hi Javier, Thanks a lot for reaching out! Please, let me talk with the Dev Team about your question. And I´ll get back to you tomorrow :D Have a nice day! Carlos
-
Yes, I´m afraid that the NVidia codecs are not available in trial version. I´m so sorry. Please, do not hesitate to contact us via forum or Support Portal if you have more questions or issues. Have a nice weekend! Carlos
-
Hi sm00th, Thanks a lot for reaching out! Which subscription have you purchased? On the other hand, this graphic card is older to be supported in NVidia options, however, please, try to download and install the last driver. If there are possibilities to be supported, it has be by installing the last driver. Have a nice day! Carlos
-
Hi Elliott, Yes, this behavior is weird. Don´t worry, please, open a ticket in https://support.sgo.es/support/home and we´ll take a look deeply to your issue. Cheers!
-
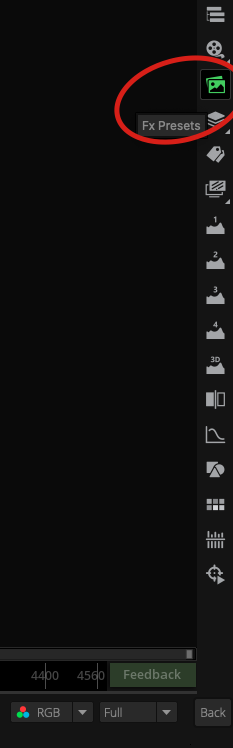
Hi Rakesh, Sorry for the delay. To import a preset, you can do it as the same way to applying a preset in Mistika Boutique. Please, open your VR stitch and select the FX presets tab: The Fx Presets tab will be opened, then, select the folder that contains the presets. In the case of the presets that Mistika VR brings by default: SGO AppData/VR/etc And select you preset. Please, let us know if you have more questions. Cheers! Carlos
-
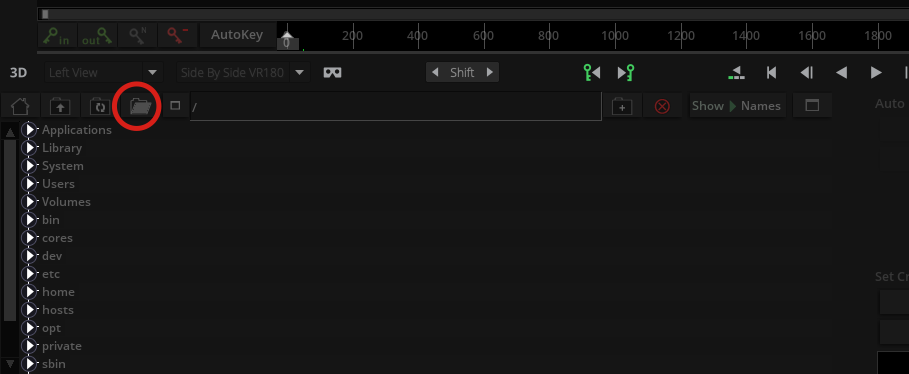
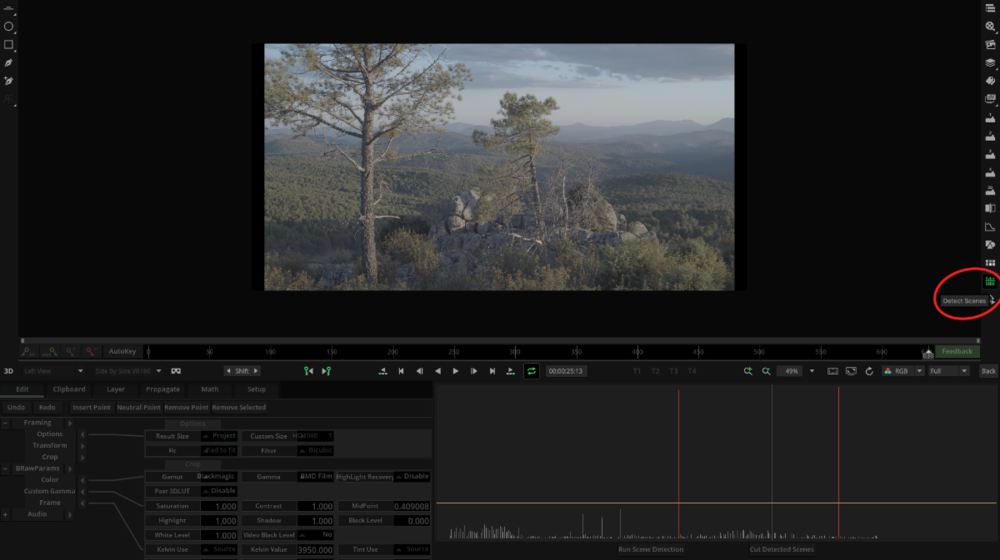
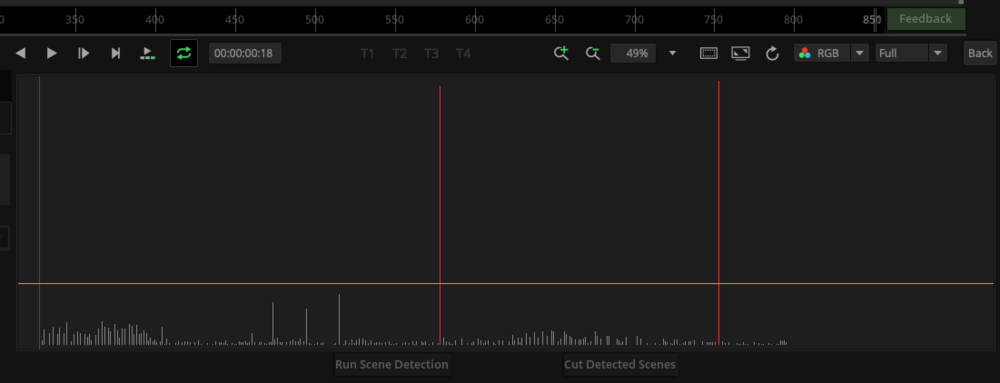
Hi Red one, Thanks a lot for reahing out! You can find the detect scenes button inside the Visual Editor. So, please, import your movie into Mistika and double clic on the clip to open it in the Visual Editor. Then: Click on the Detect Scenes Button and you will see the Detect Scenes panel. Press Run scene detection to automatically calculate the different scenes inside your clip. Then you will be able to move the threshold (yellow line) to recognice the scenes (grey lines. When they turn red they will be recognize as different cuts) and click on Cut Detected Scenes to cut them. On the other hand, to conform, you can import directly an EDL, XML or AAF to Mistika and conform it. Please, find here a tutorial about how to conform in Mistika: And how to relink media: I hope it´s useful! Cheers!
-
Hi Jan Marteen! I´ve already added you feature request to close Mistika by cmd+Q beaing asked if you want to save the project. Thank you very much!