-
 Hi kexianliang, The release of Mistika 11 was delayed due to the major framerate change we made in Mistika 10.8. This change affected several parts of Mistika's core, and we needed some time to ensure the stability of the version. Meanwhile, version 11 has been developed in parallel, adding more features and GUI changes. In fact, we have merged the metadata support from Mistika Workflows into Mistika Boutique, bringing new capabilities to manage, organize, and filter your timeline based on different metadata criteria. Additionally, we have migrated more tools to the new GUI, following the overall redesign that we have been working on for the past few years. Our current focus is on supporting new standards and improving/redesigning the GUI. Now that we have released 10.8, we can concentrate entirely on version 11 to release it as soon as possible. Cheers!
 -
HI! Thanks for your insterest in Mistika! We are really proud of being the only ones in the market that offers a real native integration between editing, color and VFX as we have made all the features instead of trying to adapt external tools and build bridges between all of them. It's one of the key features of Mistika, and one of the strongest points of the software. Having said that, Mistika is a finishing software, so we normally focus more in some areas like color and VFX and a bit less in editing functionalities or audio features. What we always try to do is to make the communication between the different departments or softwares in the smoothest way. For example we have included a new automatic VFX import system that removes the need of import and place manually the different versions of external VFXs, For the editing we work in the same direction, supporting as many conform files as we can (optimizing the process with some advanced tools), and making the round-trip between Mistika an editing softwares as simple as possible. Maybe in the future we will add more editing features, but at this moment we work in that direction, as most of our clients have a fixed and solid editorial environment (with AVID being the most common software). Audio mixing tools are out of that roadmap at this moment, to be honest. In Mistika you basically bring the audio from other tools, place it below your project in your timeline and that's it. But that audio is mixed out of Mistika. I hope this helps to answer some of your questions. If you need more info let me know.
-
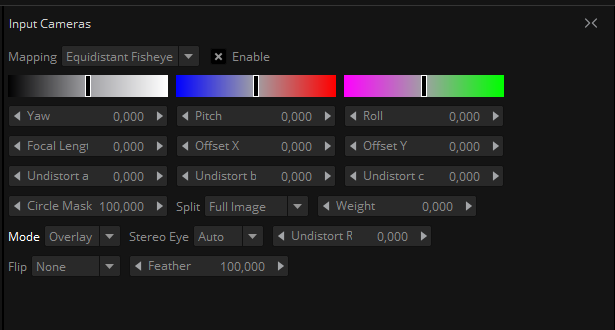
Hi! I think Mistika Boutique may be better for this kind of workflow, as you can compose and fix every detail of the composition there. In Mistika VR what you can do is to place the video in the 360 space by using the overlay mode in the Input Camera panel. Just load your video in the camera stack, as you have done. Select the video and in the Input Camera, search for the Mode option and change it to overlay. In the Mapping option you would probably need to set it to planar, as I imagine is a standard video (in the example below is in the defoult mode, in Fisheye, but change it anyway). This should let you control that video as an overlay. If you need to soft the borders you will need to bring the same footage but with an alpha embedded with the edges already soft. This is where Boutique is specially useful, as you can do everything in there. But it's the oonly step you probably would miss here.
-
Hi! In C:\Program Files\SGO Apps\Mistika VR\etc\curves there is a file called VRStitch.proto that controls those parameters, but maybe is not obvious or easy to change in a first approach. I think the best way to do it is just by saving a preset with those parameters changed to what you want and the every time you import your media in Mistika VR, a pop up window will appear asking for applying a preset to all your shots in one go, you can apply that preset and then start to work from there. You can even enable the option of not showing again to keep those values everytime you import something in VR. Regarding the render preset, is not simething available right now in Mistika VR, it is in Boutique and of course in Workflows as the render preset is in fact a Workflows project. Cheers!
-
Hi guys, In the previous webinar session, we talked about some custom Fx that I prepared for skin selection and another one for beauty pass. I've combined both in a third one that isolates the skin and applies the Beauty Pass in some automatic way (although you can control the value from the Color Grade included in the stack, I've renamed to make it clear). Keep in mind that the skin selector is created for SDR images, so depending on the project can be more or less useful. I think what is really interesting is the fact you can play with these effects, change parameters and see how they work in order to understand a bit better the capabilities of Mistika. Then you can tweak them to get better results. If you have your own custom effects and you want to share them feel free to do it here, and we will collect them in some kind of library that is open for everyone. To use any pfx just drag and drop over the timespace or save it in your Global Presets folder to have access to them in any project. I put the webinar that I mentioned before in case you couldn't watch it. Q&A Webinar Session Cheers! 003_Beauty Pass with Skin Selector.pfx 002_Beauty Pass.pfx 001_Skin Selector.pfx
-
Hi Ash, We will upload those templates very soon, with the video of the session so the people knows how they work. Once the video is up we will open a thread with those FXs
-
Hi! There is no difference from the render point of view, but the links to that render and the RND (the metadata generated for the Draft render) is placed in the Render Draft folder instead of the Render folder in the DATA folder of the project. It's just a way to organize your quick and draft renders for preview or whatever. And in this way leave the Render folder clean for master renders.
-
Hi Yoav, You can work in the same way, but instead of leaving your media in Project, you have to leave it on Input (propagate the value, in the future we will add this as a general option so you can select the behaviour). Once you have it in Output you can apply on top a Framing or a Display Filter and automatically all your shapes and adjustments will be adapted to your project resolution.
-
Hi Jan, It's exactly what Yoav says. The pivots have two modes, depending on the Knee Soft, if its enabled or not. If it's not enable, the pivots doesn't "break" the curve into Black, Gamma and White as you probably expected, because it extrapolates the gamma adjustment affecting whites. It doesn't change the normal math of the traditional Primary correction. So instead of understanding these pivots as ranges (like in Bands), where you limit the different ranges of the trackball, here the white pivot reacts in fact as a real pivot, so the curve rotate at that point when you control the gamma, but again it extrapolate that change to the whites to keep the consistency of the curve. When you enable the Knee Soft, the math changes. And then it reacts in a more "ranges" way, so the whites are not extrapolated from Gamma, they are a full independent control, which allows you to fix the position of the white and control the gamma in a separated way. This mode is really useful in many circumstances, but depending of the amount of softness of the Knee Soft (0 is no softness), you can "break" the curve in the white pivot, which is something that do not happen with the Knee Soft disabled. So basically, Primary has two modes: one with Knee Soft enabled and one with Knee Soft disabled. It affects Whites especially, and it is especially useful for HDR projects (that's the reason why we call HDR to the mode with the white point at 50 and the Knee Soft enabled). It's true that the 50 value is not a real value for PQ or HLG, but many clients have reported it works well in both scenarios.
-
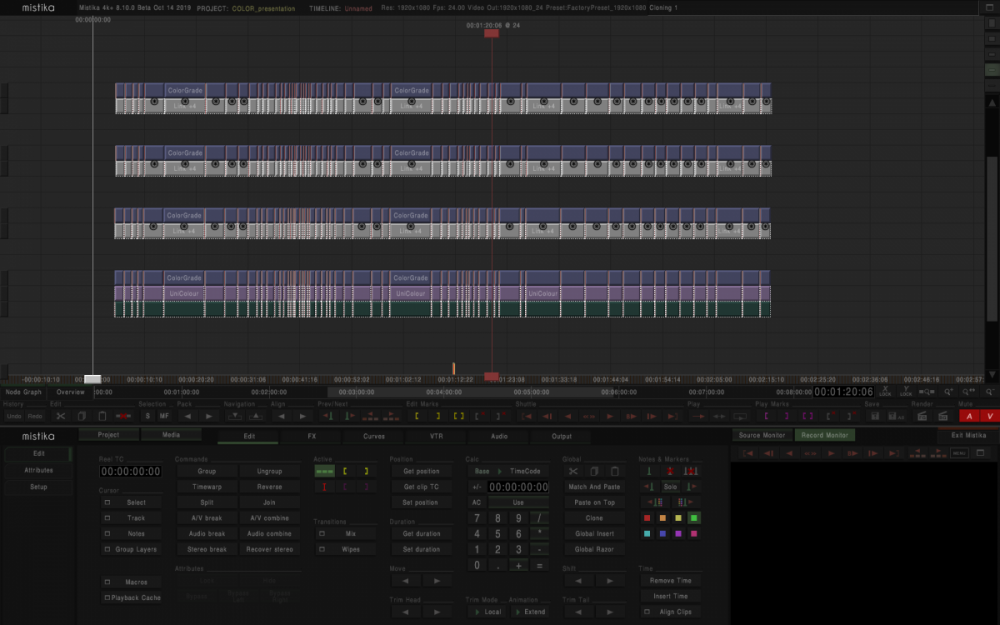
Hi Jan, I normally don't like the idea of duplicating full timelines for "easy versions". I do it if I am going to make major changes and for some reason I want to keep my previous one (like bringing some especific effects, or grades, but knowing that most part will change). If the version is done over the original one I prefer to load just a new color Grade Track in which I will make the changes. I can bypass any time the original grade, so managing this is quite fast. Then I can create multiple versions of the same shot by using the History function. Honestly, I normally don't care if in one shot I have 3, 4, 5 or 10 versions, Mistika won't go slower so I will just keep the one that I want. And I can always copy that grade to other shots by bringing the correction or coping all the versions in just one go by copy the entire Color Grade to other selected shots with a couple of clicks. Another option (and this is a small trick), is using the Link effect. Let's say that I don't want to have multiple Color Grades one above the other, because it makes the timeline a bit messy. And duplicating the whole timeline, even in the same timespace, can make things a bit more complicated because you have to bring things from one copy to another. Well, using Links you can put your several copies in vertical without messing too much the timespace. Basically open the Node Graph and duplicate one of the links to create the clip in the Timespace. Now you can close the Nodegraph. Place the Link on top, extend it to the whole duration of the timeline and make an Split conform to divide it in individual shots. With this link you can point to any position in vertical, so basically you have multiple versions, but avoiding duplicating those effects that you know they won't change (like Raw params, Unicolours, Framings, etc). In that way you can create multiple versions of your timeline in a more cleaner way. And because you have them in vertical, review any one of them is as easy as bypass or Hide the version that you don't want. You can even create a comp3D that splits the image in several cuadrants to compare all the versions at the same time. I attach an image to show you a simple example:
-
Hi, Have you tried using Gamma 2.4 with Rec 709 instead of the ITU 709. Normally the grading that is done in 709 (and the settings of the Color Monitor for this kind of grading), is normally done in 2.4 instead of the ITU 709. I think Resolve applies gamma 2.4 as well, as it is the real standard.
-
Camera Presets updated for Boutique following the latest Mistika VR build.
-
Hi Rakesh, we have uploaded the files for the Tangent Wave 2. You can find them here:
-
Hi guys, We have finally finished the mapping for Tangent Wave 2. The reason why it took some time is because we have dramatically improved the organization of the functionalities in Mistika to allow the remapping using the Tangent Mapper app. This is not yet integrated into the current builds, because we still need to organize the Stereo3D FX and add more functionalities in our library to offer you more flexibility when remapping the panels. Everything related to Colour, Memories, Color Histories, Shapes, Keyers, Framing, etc is now much better organize for remapping the panels. We will include this as soon as we finished what we consider the basic library of functionalities. For now, you can install the current version manually (please, make a Backup of the replaced files) 1) Download the attached file and extract it. 2) Copy the controls.xml file in MISTIKA-ENV/config/sys-Element 3) Copy the tangent-map.xml in MISTIKA-ENV/shared/users and in MISTIKA-ENV/shared/users/*your user*. If you only want to have the latest files for remapping your panels, you can finish the procedure here. 4) For those that wants the mapping for the Wave 2, copy the mistika folder in the attached file in the Tangent/Hub folder of your OS. This folder is a bit hidden if you haven't selected its location in the Tangent Mapper App. For example, by default in Windows is in C:\Users\*your_user*\AppData\Local\Tangent\Hub. You can define this folder in the Tangent Mapper application. 5) Restart Mistika in case it was running all this time to see the changes. With this procedure, now you should be able to enter in the Tangent Mapper and see a virtual version of the mapping as long as you have a panel connected and a Mistika running. From there you can just click on one of the buttons and you can assign a functionality, which now should be organized in categories. If you have any questions or feedback, please use this topic for that. This is not yet a released feature so is much better to not use the support system for this kind of issues until this change is part of the current builds. Thanks for your support and enjoy mistika! tangent_wave_2.zip
-
Hi Jan, This is the right behaviour, in the sense that when you double click an effect inside a Dummy Group what you are doing is loading the dummies themselves instead of the final result. In other words, you are editing the Dummy Group not the result of the group. What you can do is to create Dummy Groups inside Dummy Groups in those points where you need to preview the result of some specific combination. So for example, in your case, you can create a Dummy Group that contains the Skin Key, the Pre Key and the Dummy 1. The result would be the same, but that Dummy Group will allow you to preview the result of that composition.


Important Information
We have placed cookies on your device to help make this website better. You can adjust your cookie settings, otherwise we'll assume you're okay to continue.